BEGINNER’S POKE BOWL
In Hawaii, we love our poke bowls. Put some rice in a bowl and top with fresh sliced fish, customize your toppings and top with a shoyu vinaigrette. It’s the island version of grabbing a sandwich…grain, protein, veggies and sauce. Aloha, done.
Let’s break it down: fresh means raw and shoyu is soy sauce and poke is pronounced POH-keh. Did I lose you at the raw fish? Hang in with me because you’re gonna love this Beginner’s Poke Bowl.
Let’s start by the pickled toppings that really give a good crunch with your bowl but take at least an hour to marinate. Make a light pickling solution with rice vinegar and sugar. I use a ration of 3:1; vinegar to sugar. Add a pinch of sea salt. For the pickled veggie-crunch: stir together the vinegar, salt and sugar to dissolve. Julienne a large carrot and two radishes. Thinly slice a Japanese cucumber and 6 slices jalapeno pepper. Save yourself a bowl and mix the vinaigrette in a sealed storage container, add in your prepped veggies; giving all a good toss. Let it pickle at room temperature for one hour. Or if you’re really on the ball, do it the night before.
Cook brown rice according to the package directions. For an authentic Hawaiian-style rice, make the sticky by rinsing, adding a little extra water and letting it cook low and slow. Remember, you want the rice to not be fluffy as you need it kind clumpy to be able to use your chopsticks. My friend Satomi taught me this easy technique when we lived in Japan. Put your rice in a large pot, swish the rice five times (please don’t question Satomi). Pour off the extra rinse water each time because you’re rinsing off some of the starch to help it cook to the right texture. You get the exact amount of water by resting the tip of your index finger on the damp rice and gently adding enough water to reach the first joint of that finger. It works like magic for any amount of dried rice you add to the pot; no need to break out the measuring cups. Stir in a pinch of sea salt, giving a good stir, and bring to a boil. Once you see the first vigorous boil, turn down to low and cover pot with lid. Simmer and keep covered for 45 minutes (don’t peak cuz you’ll let off steam). Remove from heat and let rice come to room temperature before adding to your dish.
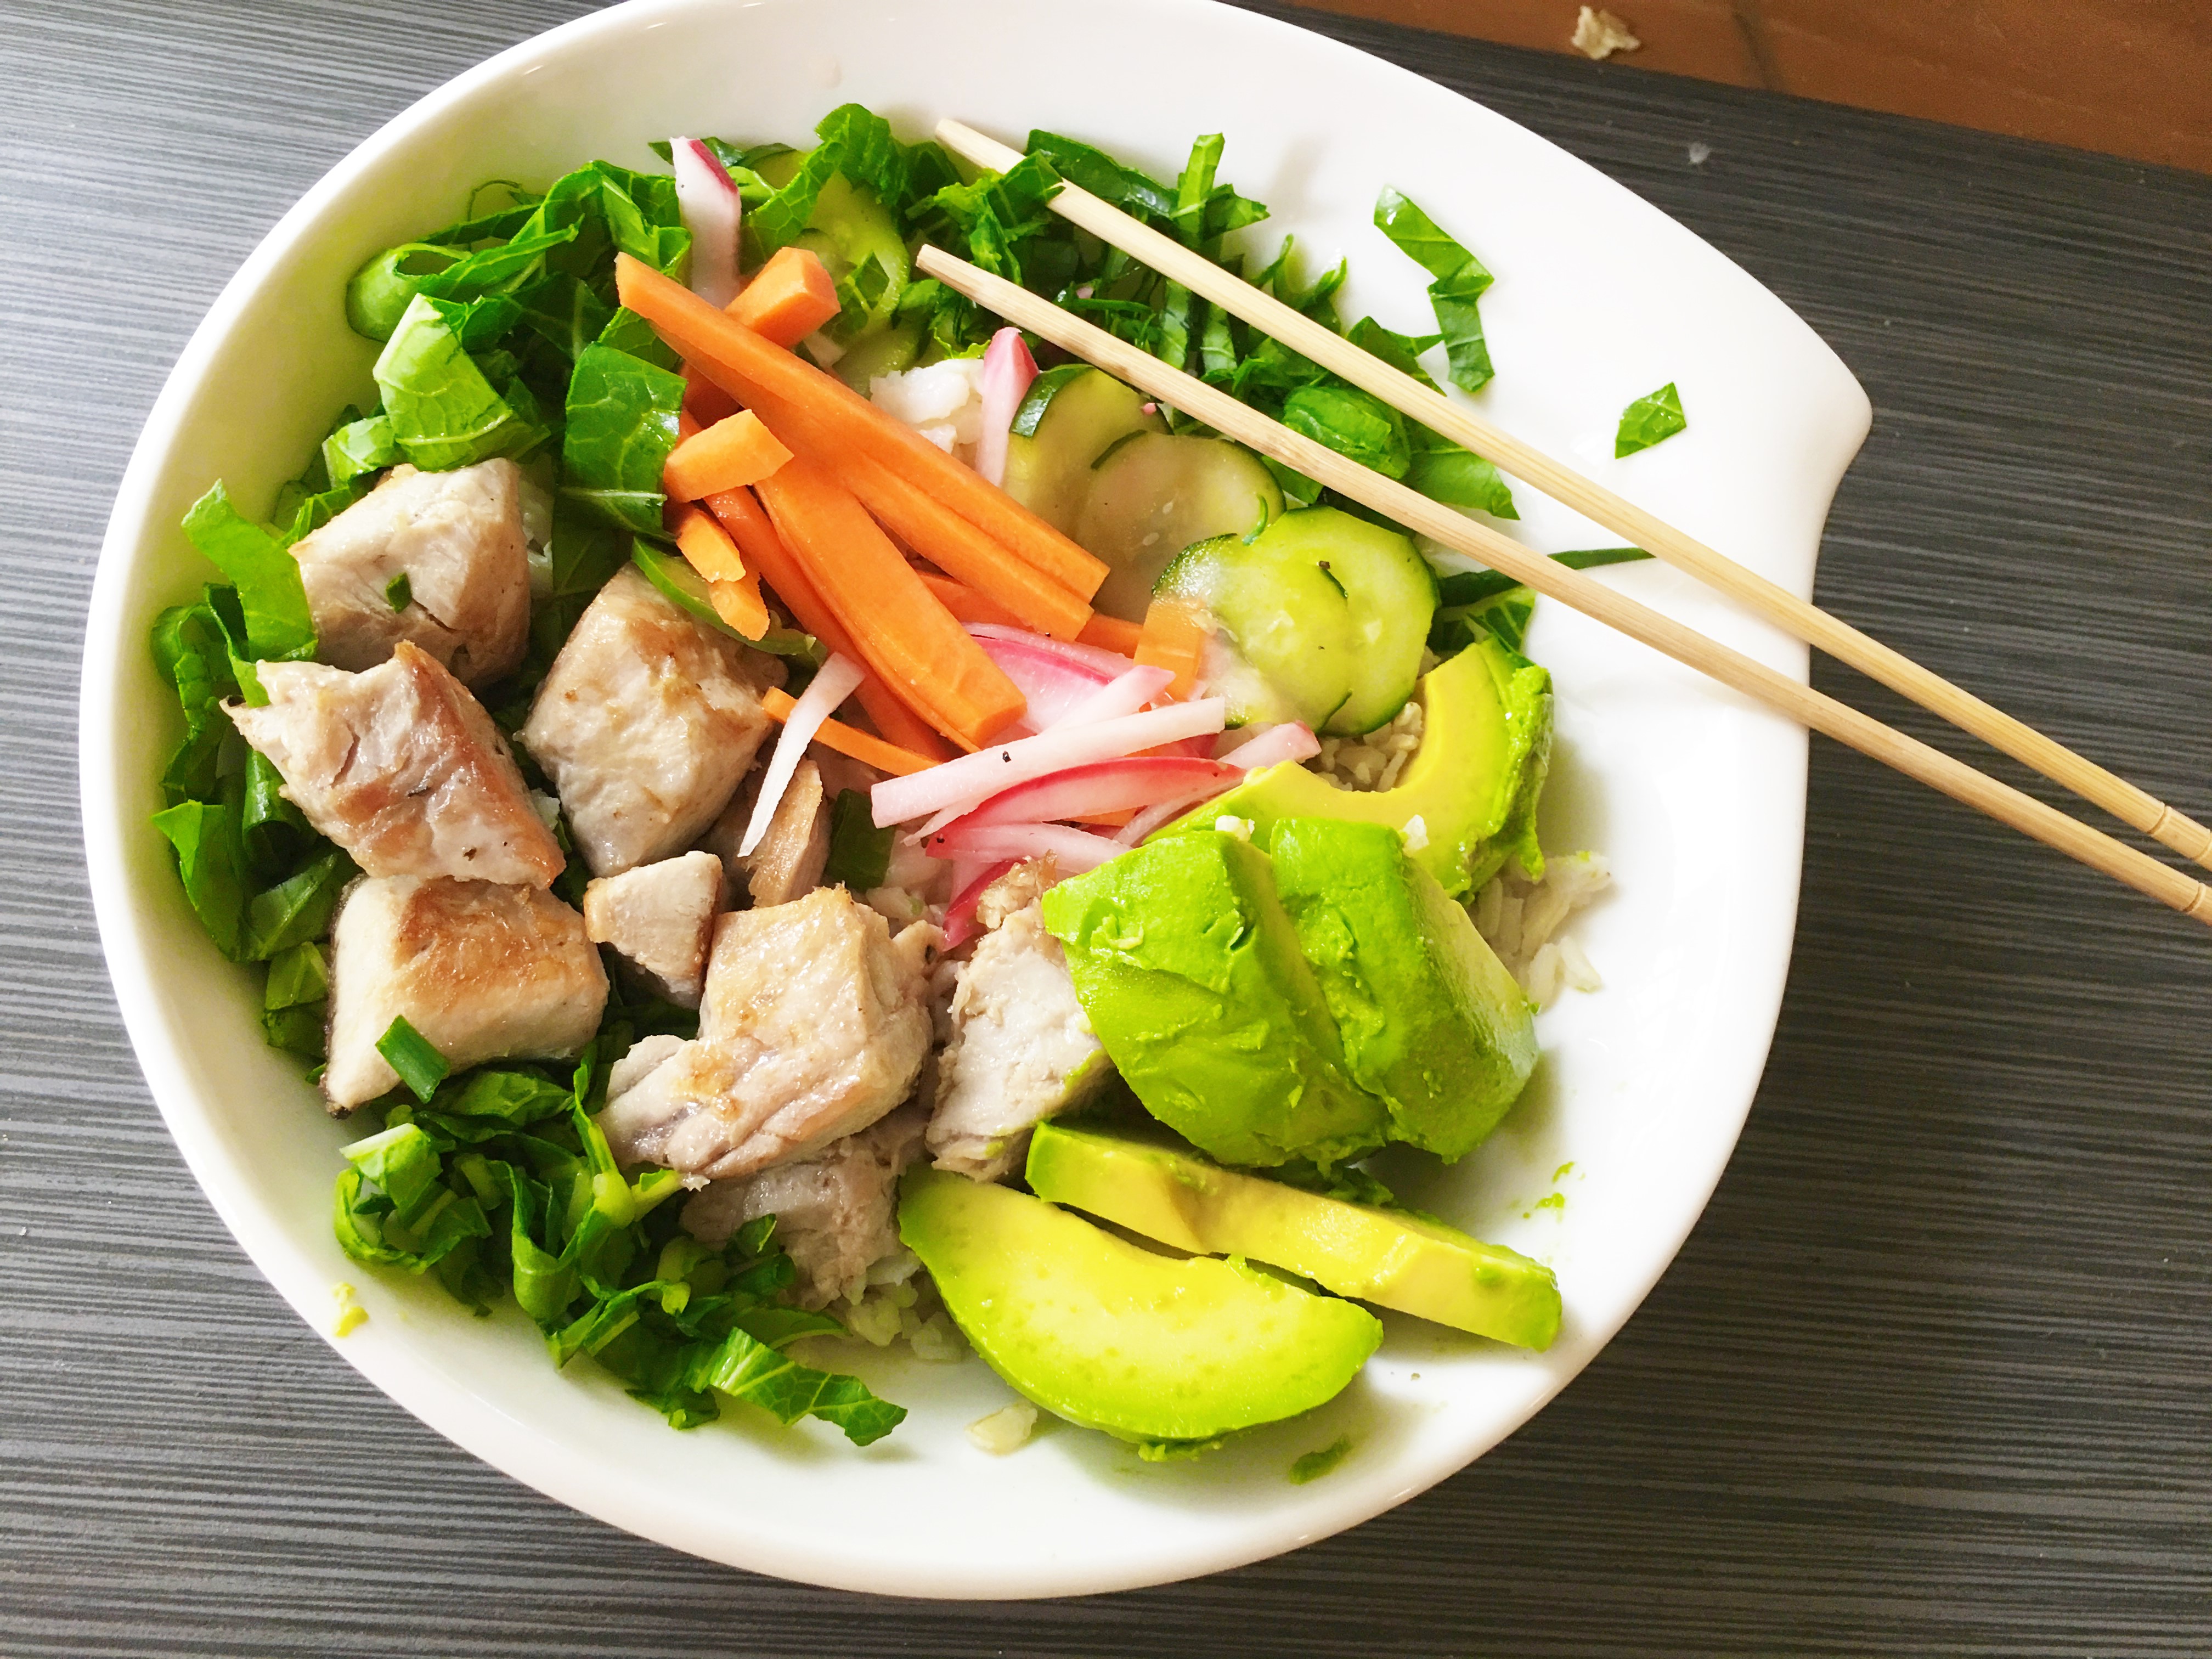
Once you have your rice cooked and your veggies pickled, assembling your Poke Bowl just takes minutes. The star of the Poke Bowl is your Hawaiian Ahi (or shrimp, octopus, salmon). Oh no, too soon to introduce octopus in this beginner’s poke primer? You’ll get there and trust me it’s delicious.
Take your gorgeous red Ahi steak, cut into about one-inch cubes, season with kosher salt and cracked black pepper. Sear the tuna is a hot skillet coated with a swirl of olive oil. In Hawaii, we eat it raw but for the beginner I suggest cooking it to your liking by kissing it with some heat. Let the cubes sit undisturbed in your skillet for a second to get a tiny bit browned, don’t feel you have to keep tossing it around the pan. I like my tuna with the edges golden and the center red. It will be easier to get that raw center-toasted outer by cutting the tuna into a larger cube. If you order a poke bowl here in the islands you’re gonna get your raw fish cut into small cubes. Actually, the word poke means to cut up into bits. Let’s get back to your pan and Ahi, err on the side of taking it out before you think as it will keep cooking a bit.
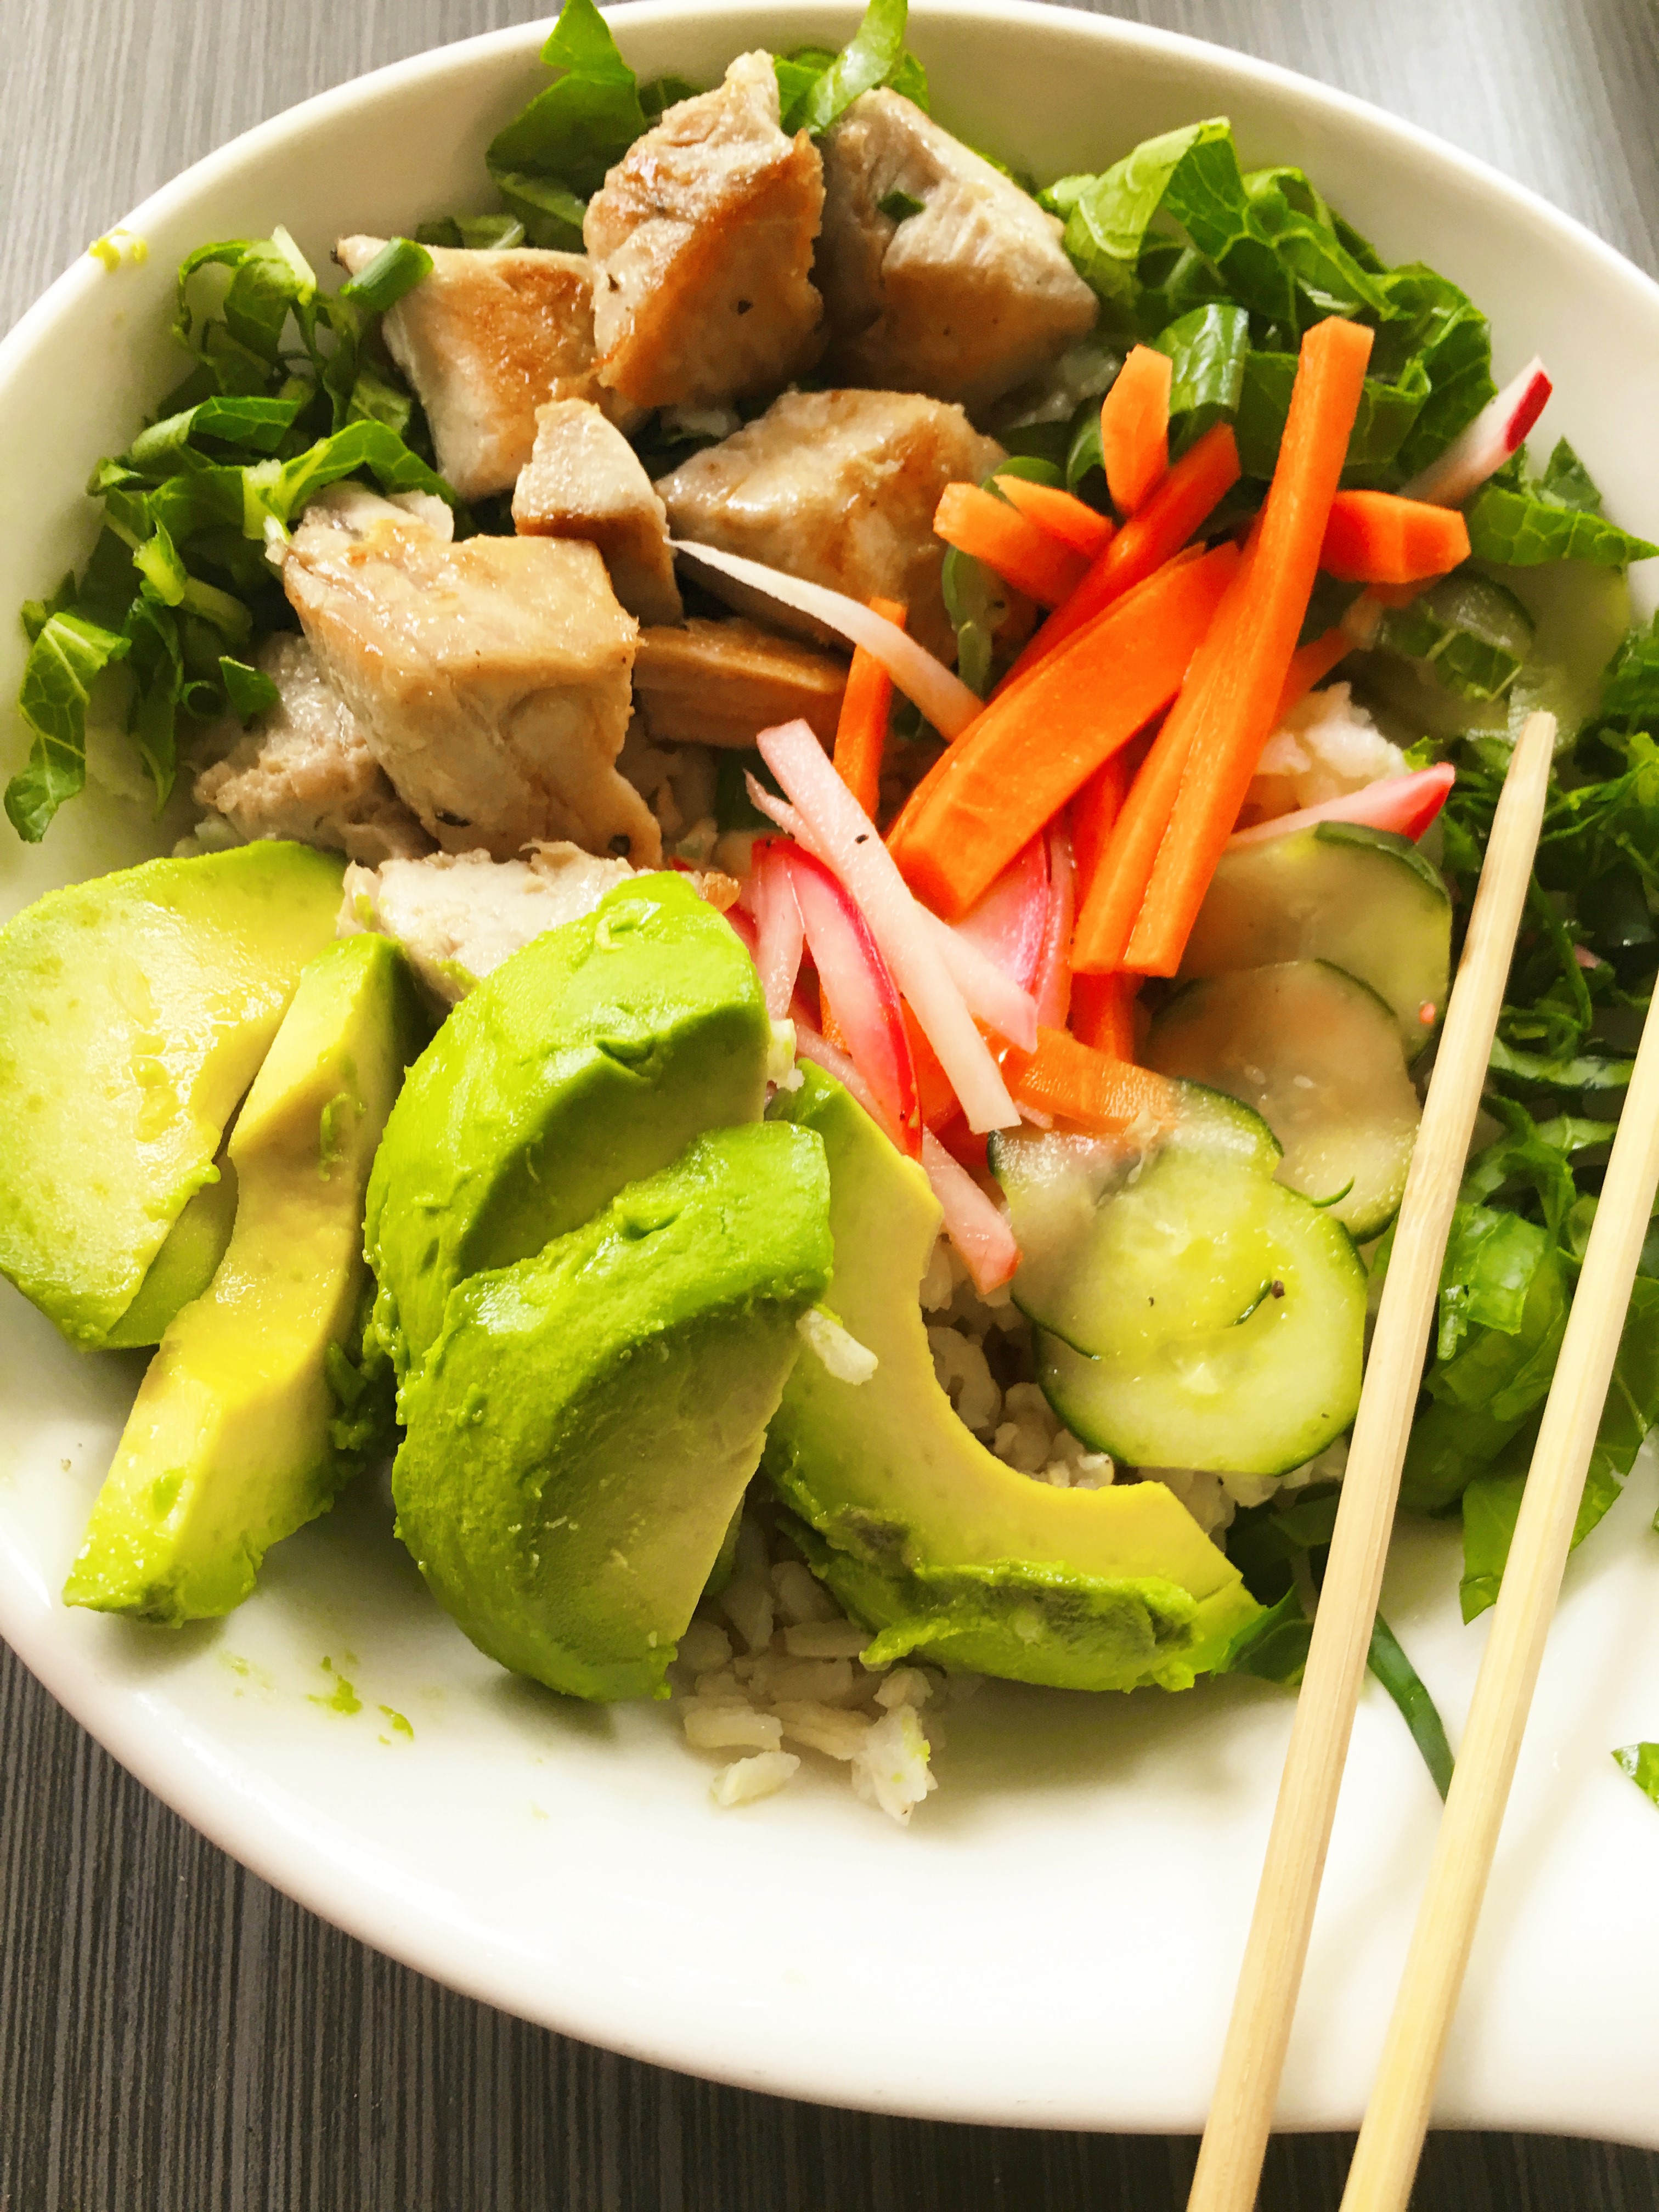
Assemble your bowl with a large scoop of brown rice in your bowl, then create a beautiful landscape of toppings. Top with your seared Ahi, pickled veggies, fresh avocado slices and I like a mix of thinly sliced green onions with pok choi(bok choy). Mix a simple dressing of tamari, rice vinegar and sesame oil. Finish it all with a spritz of fresh lime, especially important for keeping your avocado green and vibrant. Make it truly authentic… sprinkle with toasted sesame seeds or furikake.